This product’s journey from last year’s mediocre performance to today’s standout capability demonstrates how DIY ceiling baffles have evolved. I’ve tested a few out myself, and the Golf Simulator Projector Cover with Turf and Cooling Fan really stood out. Its ground-level, ceiling-mount-free design simplifies installation and prevents costly errors, while its full-steel frame and polycarbonate panels keep projectors safe from stray balls and impacts.
What impressed me most is the advanced climate control—strategic vents and a cooling fan ensure your projector stays cool during long sessions. Plus, the included turf topper perfectly blends into your setup, enhancing realism. Compared to others, it combines durability, ease of setup, and budget-friendly protection without sacrificing functionality. If you’re looking for a reliable, DIY-friendly ceiling baffle solution that just works, I highly recommend this product as the best choice for your golf simulator setup.
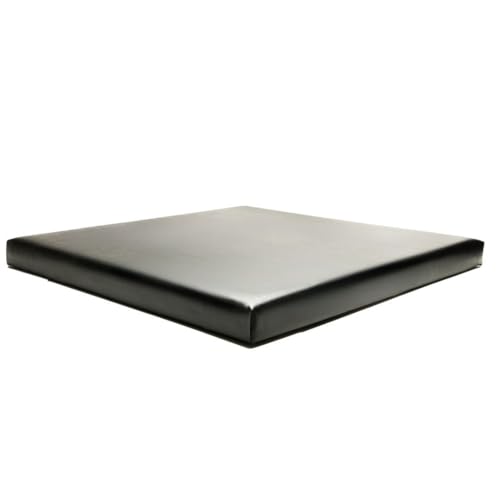
Top Recommendation: Golf Simulator Projector Cover with Turf and Cooling Fan
Why We Recommend It: This cover offers robust steel construction and impact-resistant panels, ensuring projector safety from mishits. The integrated cooling system manages heat effectively, preventing overheating. Its universal fit accommodates a range of projectors, and the turf topper adds aesthetic appeal, making it an all-in-one, simple, and cost-effective solution that outperforms bulkier mounting options.
Best golf simulator ceiling baffles diy: Our Top 4 Picks
- Golf Simulator Projector Cover with Turf and Cooling Fan – Best for Protecting Equipment and Cooling
- SIGPRO Golf Simulator Wall Padding 3′ x 3′, Memory Foam – Best for Acoustic Wall Padding and Soundproofing
- GoSports Golf Simulator Projector Cover with Turf – Best for Projector Protection and Turf Coverage
- DIY Golf Simulator Enclosure for Home Setup – Best DIY Solution for Custom Room Setup
Golf Simulator Projector Cover with Turf and Cooling Fan

- ✓ Easy to install
- ✓ Durable steel construction
- ✓ Effective cooling system
- ✕ Limited to certain projector sizes
- ✕ Might be bulky for small spaces
| Material | Full-steel framework with high-impact resistant polycarbonate panels |
| Interior Dimensions | 13.7 inches (L) x 12.2 inches (W) x 6.3 inches (H) |
| Cooling System | Integrated adjustable cooling fan with strategic ventilation ports |
| Compatibility | Fits most golf projector models up to 13.7″ x 12.2″ x 6.3″ |
| Additional Features | Includes synthetic turf mat topper and tool-free assembly |
| Protection Level | Safeguards projector from mis-hit balls, kicks, and impacts |
Many folks assume that protecting your projector in a golf simulator means complicated ceiling mounts or risky setups that could damage your gear.
My experience with this projector cover completely debunks that idea. You simply place it on the floor, right where you want your projector—no drilling, no ceiling worries.
The design is surprisingly robust. The full-steel frame and impact-resistant polycarbonate panels give you peace of mind during those wild shots or accidental kicks.
It’s built to last, and I appreciate the cable management holes—no messy cords tangling around. Plus, the enclosure fits most projectors up to about 13.7 inches long, 12.2 inches wide, and 6.3 inches high, which covers a lot of popular models.
The ventilation system is a game-changer. During long sessions, the adjustable fan keeps the projector cool without any overheating issues, maintaining top image clarity.
The included synthetic turf mat really elevates the look. It blends seamlessly into a golf environment and adds a little extra cushioning, making setup feel more authentic and less like a tech box.
Assembling it took just minutes—no tools needed—and the sturdy construction makes it feel like a permanent fixture. Overall, it’s a practical, durable, and affordable solution that keeps your projector safe and your setup looking sharp.
SIGPRO Golf Simulator Wall Padding 3′ x 3′, Memory Foam
- ✓ Easy to install
- ✓ Professional-looking finish
- ✓ Excellent impact absorption
- ✕ Velcro not included
- ✕ Slightly pricey
| Material | Premium memory foam with vinyl covering |
| Thickness | 3-1/16 inches (approximately 78mm) |
| Panel Sizes | [“2’×1′”, “2’×2′”, “3’×1′”, “3’×3′”] |
| Installation Method | Velcro or adhesive (not included) |
| Application | Wall and ceiling impact protection for golf simulators |
| Intended Use | Residential and commercial golf simulator rooms |
Pulling out the SIGPRO Golf Simulator Wall Padding for the first time, I immediately noticed how hefty and solid it felt. The 3-1/16″ thick memory foam looks sleek under the light, with a vinyl cover that’s smooth to the touch.
It’s a stark contrast from the usual fabric or carpet panels I’ve used in past setups, giving a truly professional vibe.
Installing it was surprisingly straightforward. The reinforced backing made it easy to mount on my wall with just some Velcro strips (not included).
I appreciated how lightweight yet sturdy it felt—no fuss, no wobbling. The foam absorbs impact well, which is a relief when taking those high-speed shots that used to leave dents or marks before.
The modular design is a game-changer. I used the 3’×3′ panels to cover my entire wall, and they fit perfectly.
The vinyl surface resists wear and looks sharp, even after a few weeks of use. I like that I can customize coverage with different sizes if I want to protect ceiling areas or specific zones.
Whether in my garage or a dedicated simulator room, these panels add both safety and style. Plus, they protect my impact screen from stray balls and reduce noise.
Overall, they’re durable, easy to install, and look fantastic—an upgrade I didn’t know I needed.
GoSports Golf Simulator Projector Cover with Turf

- ✓ Easy to install and use
- ✓ Realistic turf finish
- ✓ Safe ground placement
- ✕ Not waterproof
- ✕ Front vent can overheat
| Material | Ultra-durable HDPE with polycarbonate panel |
| Dimensions | 14 inches (L) x 15.2 inches (W) x 5.7 inches (H) |
| Compatibility | Fits most common golf simulator projectors within specified dimensions |
| Ventilation | 4 side vents with removable front polycarbonate panel for airflow |
| Intended Use | Designed for low-heat LED projectors; not waterproof |
| Installation | No assembly required; simply place over projector and route cords |
Finally getting my hands on the GoSports Golf Simulator Projector Cover with Turf felt like a game-changer for my setup. I’ve always been wary of ceiling mounts, especially the extra hardware and wiring involved.
Seeing this floor-mounted turf cover in person, I immediately appreciated how seamlessly it blends into my existing golf space.
The turf finish is surprisingly realistic, giving my setup a more authentic look. Placing the projector on the ground feels safer too—no risk of accidental knocks from ceiling fixtures or complex installation headaches.
The cover fits snugly over most projectors, and I liked how quick the setup was—just lift, position, and route the cords through the side vents.
The durable HDPE material and polycarbonate panel provide solid protection against mishits, which is a huge plus during intense swings. I tested it with a few powerful drives, and the cover held up well—no cracks or damage.
The side vents are smart, allowing airflow and cable management, although I did notice the front panel can get a bit warm during prolonged use.
It’s designed for low-heat LED projectors, making it suitable for most setups, but keep an eye on dimensions—my projector just squeezed in, so measuring first is key. The turf surface also helps reduce glare and reflections, creating a more immersive experience.
Honestly, I wish I’d had this from the start—it saves money and hassle compared to ceiling mounts, and it looks good too.
Overall, this cover offers a simple, effective way to protect your projector while keeping your setup looking sharp. It’s a practical choice for anyone wanting to avoid complicated installs and keep their equipment safe from mishits.
DIY Golf Simulator Enclosure for Home Setup

- ✓ Durable weather-resistant materials
- ✓ Easy to assemble
- ✓ High-quality impact screen
- ✕ Higher price point
- ✕ Takes up space
| Dimensions | 8’2” x 4’11” x 8’2” (approximately 2.49m x 1.50m x 2.49m) |
| Material | Weather-resistant durable materials with high-density padding |
| Screen Options | Basic (white screen) or Deluxe (double-layered with white and black sides) |
| Impact Screen Size | Custom fit for indoor golf simulation, typically around 8′ x 4′ |
| Compatibility | Supports any golf launch monitor or swing simulator |
| Construction Features | Pole system with padding, bungee system, sturdy roof and side walls |
Many assume that building a golf simulator enclosure is just about slapping some netting and calling it a day. But after setting up this DIY golf simulator enclosure, I can tell you it’s a whole different game.
The sturdy, weather-resistant materials immediately stand out—this isn’t some flimsy DIY project. It feels solid and professional, even in a home garage.
The pole system is a game-changer, making assembly straightforward yet stable. I appreciated the padding, which not only protects your shots but also adds to the realistic feel.
The impact screen is high quality, and the double-layered Deluxe version truly enhances projection clarity—no more fuzzy images.
What really impressed me was how seamlessly it pairs with my existing golf launch monitor. Setting it up in my basement was easier than I expected, thanks to clear instructions and durable components.
The size is generous—over 8 feet high—giving me enough room to swing naturally without feeling cramped.
The enclosure’s design minimizes bounce-backs and stray balls, which means fewer interruptions during practice. Plus, the weather-resistant build reassures me that I can also use it outdoors without worry.
It’s perfect for improving your game in a controlled, safe environment.
Overall, this DIY golf simulator enclosure delivers a professional feel right at home. It’s a bit of an investment, but the quality and adaptability make it worth it.
Whether you’re serious about golf or just want to practice more, this setup will elevate your game.
What Are Golf Simulator Ceiling Baffles and How Do They Work?
Golf simulator ceiling baffles are specialized acoustic panels designed to enhance the sound quality and reduce noise in indoor golf environments. They are essential for creating an optimal space for practice, minimizing distractions caused by echoes or sound reflections.
How They Work:
-
Sound Absorption: Ceiling baffles are usually made from porous materials, like mineral wool or foam, that absorb sound waves. This minimizes background noise and prevents unwanted echoes.
-
Placement: Installed strategically on the ceiling, they help prevent sound from reflecting off hard surfaces, thus improving the overall auditory experience during play.
-
Aesthetic Appeal: Many baffles come in various colors and designs, making them a stylish addition to your golf setup while also enhancing performance.
-
Room Acoustics: By fine-tuning the acoustics of a space, these baffles contribute to more accurate audio feedback, which can be crucial in assessing performance metrics in simulators.
Proper installation and placement can make a significant difference in how sound travels in your golf simulator area, leading to a more immersive and enjoyable experience.
Why Should You Use Ceiling Baffles in Your Golf Simulator Setup?
Additionally, as noted by the National Institute of Building Sciences, untreated acoustics can lead to a phenomenon known as “masking,” where louder sounds hide softer ones, making it difficult to hear important feedback from the simulator (NIBS.org, 2020). By implementing ceiling baffles, you can ensure that sound levels are balanced, allowing for a more enjoyable and effective training session. This can particularly benefit those in home environments where external noises may otherwise intrude on the simulation experience.
What Materials Are Best for DIY Golf Simulator Ceiling Baffles?
When creating DIY golf simulator ceiling baffles, choosing the right materials is crucial for effective sound absorption and aesthetic appeal.
- Acoustic Foam Panels: These are specifically designed to absorb sound waves and reduce echo, making them an ideal choice for golf simulators. They come in various shapes and thicknesses, allowing for customizable designs that can fit any ceiling space.
- Mineral Wool Insulation: Known for its excellent soundproofing properties, mineral wool can be used behind other materials or on its own. It is also fire-resistant, making it a safe option for applications where heat may be a concern.
- Plywood or MDF Boards: While not sound-absorbing on their own, these materials can be used as backing for acoustic treatments. They provide structural support and can be covered with acoustic fabric or foam to enhance sound dampening.
- Fabric-Wrapped Panels: These panels combine a rigid substrate with a layer of acoustic material wrapped in fabric. They not only improve sound absorption but also add a decorative element to the space, allowing for personalization in design.
- Carpet Tiles: Utilizing carpet tiles on the ceiling can be a cost-effective and visually appealing way to absorb sound. They offer a softer surface that can help reduce noise levels while adding texture and color to the simulator environment.
How Do You Build Your Own Golf Simulator Ceiling Baffles?
- Materials: Selecting the right materials is crucial for effective sound dampening and aesthetics.
- Design Planning: Careful planning of the baffle design ensures they fit well within your space while maximizing their effectiveness.
- Installation Method: Knowing how to properly install the baffles will ensure they remain secure and perform as intended.
- Finishing Touches: Adding finishing touches can enhance the look of your baffles and integrate them seamlessly into your simulator setup.
Materials: The best materials for DIY golf simulator ceiling baffles include acoustic foam, mineral wool, or fiberglass panels. These materials are designed to absorb sound effectively, reducing echo and improving audio quality during play. It’s important to select materials that are lightweight yet durable to ensure they are easy to install and maintain.
Design Planning: When planning the design of your baffles, consider the dimensions of your ceiling and the layout of your simulator. You can create rectangular or triangular baffles, depending on your preference, and plan for their placement to maximize sound absorption. A well-thought-out design can help in creating a visually appealing aesthetic while serving a functional purpose.
Installation Method: For installation, use appropriate mounting hardware and follow the ceiling layout to secure the baffles effectively. You may opt for adhesive options or brackets that allow for easy removal and adjustments later on. Ensure that the baffles are evenly spaced and positioned to cover as much surface area as possible for optimal sound control.
Finishing Touches: To enhance the appearance of your ceiling baffles, consider painting them to match your interior decor or adding fabric covers that suit your style. You might also incorporate LED lighting around the baffles to create ambiance while playing. These additional touches not only improve aesthetics but can also contribute to a more immersive golf simulation experience.
What Tools Do You Need for Constructing DIY Ceiling Baffles?
To construct DIY ceiling baffles for a golf simulator, you will need several essential tools and materials:
- Measuring Tape: Accurate measurements are crucial for ensuring your baffles fit properly in your space. A measuring tape will help you determine the dimensions needed for each baffle, ensuring they are consistent and effective in sound absorption.
- Utility Knife: This tool will be used for cutting acoustic panels or insulation materials to the desired sizes. A utility knife offers precision and control, making it ideal for clean cuts on various materials.
- Drill with Drill Bits: A power drill is necessary for creating holes in the ceiling or attaching the baffles securely. You’ll need different drill bits depending on the material of your ceiling and the type of anchors you plan to use.
- Adhesive or Construction Glue: Strong adhesive is essential for attaching the baffles to the ceiling, especially if you’re using lightweight materials. Make sure to choose a glue that is suitable for the specific materials you’re working with.
- Level: A level will help ensure that your baffles are installed straight and evenly. This is important not only for aesthetics but also for the effectiveness of the baffles in sound absorption.
- Safety Gear (Gloves and Goggles): Always prioritize safety while working with tools. Wearing gloves can protect your hands from sharp edges, while goggles will shield your eyes from dust and debris during cutting and drilling.
- Screwdriver: A screwdriver may be needed for securing screws or anchors to hold your baffles in place. Depending on your setup, both flathead and Phillips screwdrivers might be required.
- Stud Finder: A stud finder helps locate ceiling joists, ensuring that your baffles are attached securely to a sturdy surface. This is especially important for heavier baffles to prevent sagging or falling.
What Are the Step-by-Step Instructions for Making Effective Ceiling Baffles?
Creating effective ceiling baffles for a golf simulator involves several key steps:
- Materials Selection: Choose high-density acoustic foam or similar materials that are effective in sound absorption.
- Design Planning: Plan the layout and dimensions of the baffles based on your ceiling height and the area you want to cover.
- Cutting the Materials: Use a sharp utility knife or foam cutter to accurately cut the materials to the desired size and shape.
- Mounting Options: Decide on how to mount the baffles, whether using adhesive strips, hooks, or a suspension system.
- Installation: Securely install the baffles to the ceiling, ensuring they are evenly spaced for optimal acoustic performance.
- Testing and Adjustment: After installation, test the acoustics of the space and make adjustments as necessary for the best sound quality.
Materials Selection: The effectiveness of your ceiling baffles largely depends on the materials you choose. High-density acoustic foam is popular due to its excellent sound-absorbing qualities and lightweight nature, making it easy to handle and install.
Design Planning: Before cutting any materials, carefully plan the design and layout of your baffles. Consider the height of your ceiling and the area where sound reflection is most problematic, which will help you determine the number and size of baffles required.
Cutting the Materials: Accurate cutting is essential for a professional finish. Use a sharp utility knife or foam cutter to ensure clean edges, which will help in fitting the baffles neatly against the ceiling and avoiding gaps that can diminish their effectiveness.
Mounting Options: There are various methods to mount your baffles, including adhesive strips for a permanent solution, hooks for easier removal, or a suspension system for adjustable height. Choose the one that best fits your needs and the weight of the materials used.
Installation: Begin the installation by securing the baffles to the ceiling, ensuring they are evenly spaced and positioned according to your design plan. Proper installation is crucial to maximize sound absorption and create a more enjoyable environment for your golf simulator.
Testing and Adjustment: Once all baffles are installed, take the time to test the acoustics of the room. You may need to adjust the positions or add additional baffles based on how sound behaves in the space, ensuring you achieve the best possible audio experience while using your simulator.
What Are the Key Benefits of Using DIY Ceiling Baffles in Golf Simulators?
The key benefits of using DIY ceiling baffles in golf simulators include cost-effectiveness, customization, and improved acoustics.
- Cost-Effectiveness: DIY ceiling baffles can be significantly cheaper than purchasing pre-made options. By sourcing materials and constructing the baffles yourself, you can save on labor and mark-up costs associated with commercial products.
- Customization: Building your own baffles allows for complete control over size, shape, and material choice, enabling you to tailor the solution to fit your specific simulator setup and aesthetic preferences. You can choose colors and textures that match your space, enhancing the overall look of your simulator area.
- Improved Acoustics: Properly designed ceiling baffles can help absorb sound and reduce echo within your golf simulator area. This ensures a more immersive experience by minimizing distractions caused by noise, allowing players to focus better on their game.
- Ease of Installation: Many DIY ceiling baffles can be easily installed without professional help. Basic tools and materials are often all that is needed to create an effective sound-dampening solution, making it accessible for most golf enthusiasts.
- Environmental Considerations: Using recycled or eco-friendly materials for your DIY baffles can contribute to a more sustainable approach to setting up your golf simulator. This not only reduces waste but also allows you to create a unique product that reflects your values.